|
Recommendations
In this step, the analyst makes the final recommendation(s). While it is possible to make multiple recommendations, each recommendation is limited to a single countermeasure. Ultimately, each recommendation will result in one of the following actions after the subsequent review/approval process:
1.No Action: no improvements recommended after detailed highway safety investigation.
2.Capital Improvements: larger scope and cost project recommended when low-cost non-capital projects have been unable or are unlikely to resolve the underlying safety problem.
3.Maintenance Improvements: routine non-regulatory measures recommended such as the installation, replacement, or moving of warning signs, the removal of brush impeding sight distance, the application of certain pavement markings, and resurfacing or pavement grooving.
4.Initiative: selective education and/or enforcement recommended.
When the Recommendation step is first entered, the Recommendations page is displayed with a map at the top and a Recommendations grid at the bottom. It should be noted that when this step is visited for the first time during an investigation, there are no recommendations, therefore the grid is not visible and the user will need to click the ADD RECOMMENDATION button to begin as shown in the image below.
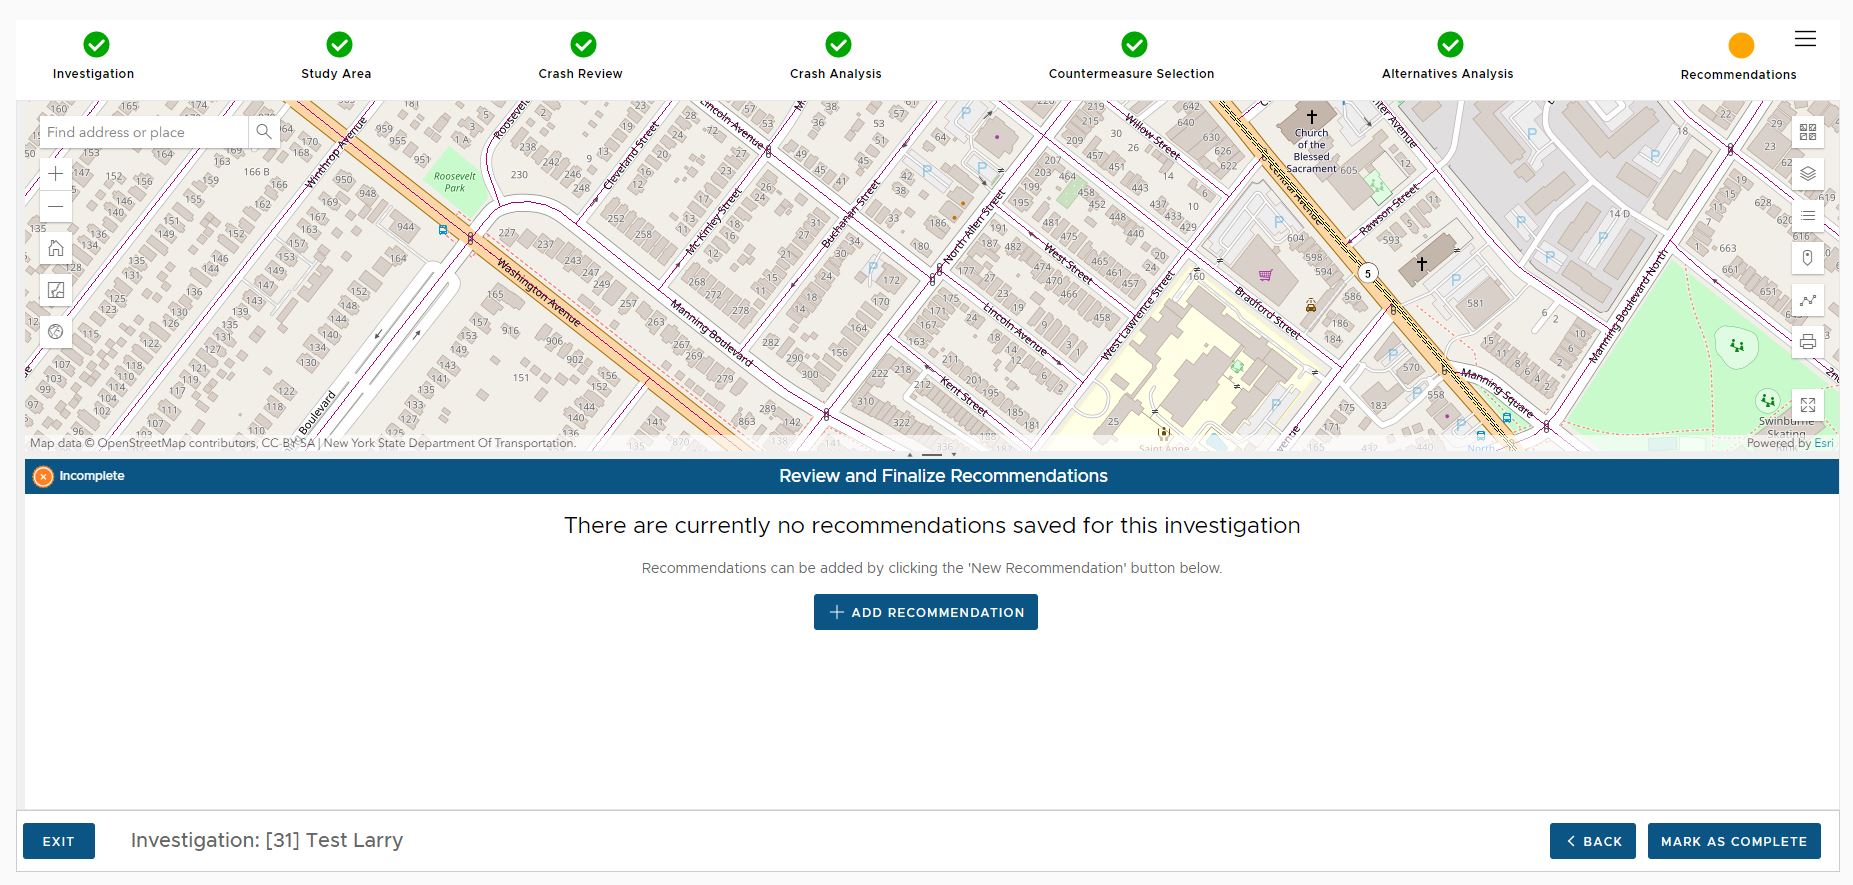
Adding a Recommendation
To add a recommendation, the user clicks the ADD RECOMMENDATION button, which displays the Recommendation Details page as shown below. The Recommendation details panel is on the left, with a map display on the right.
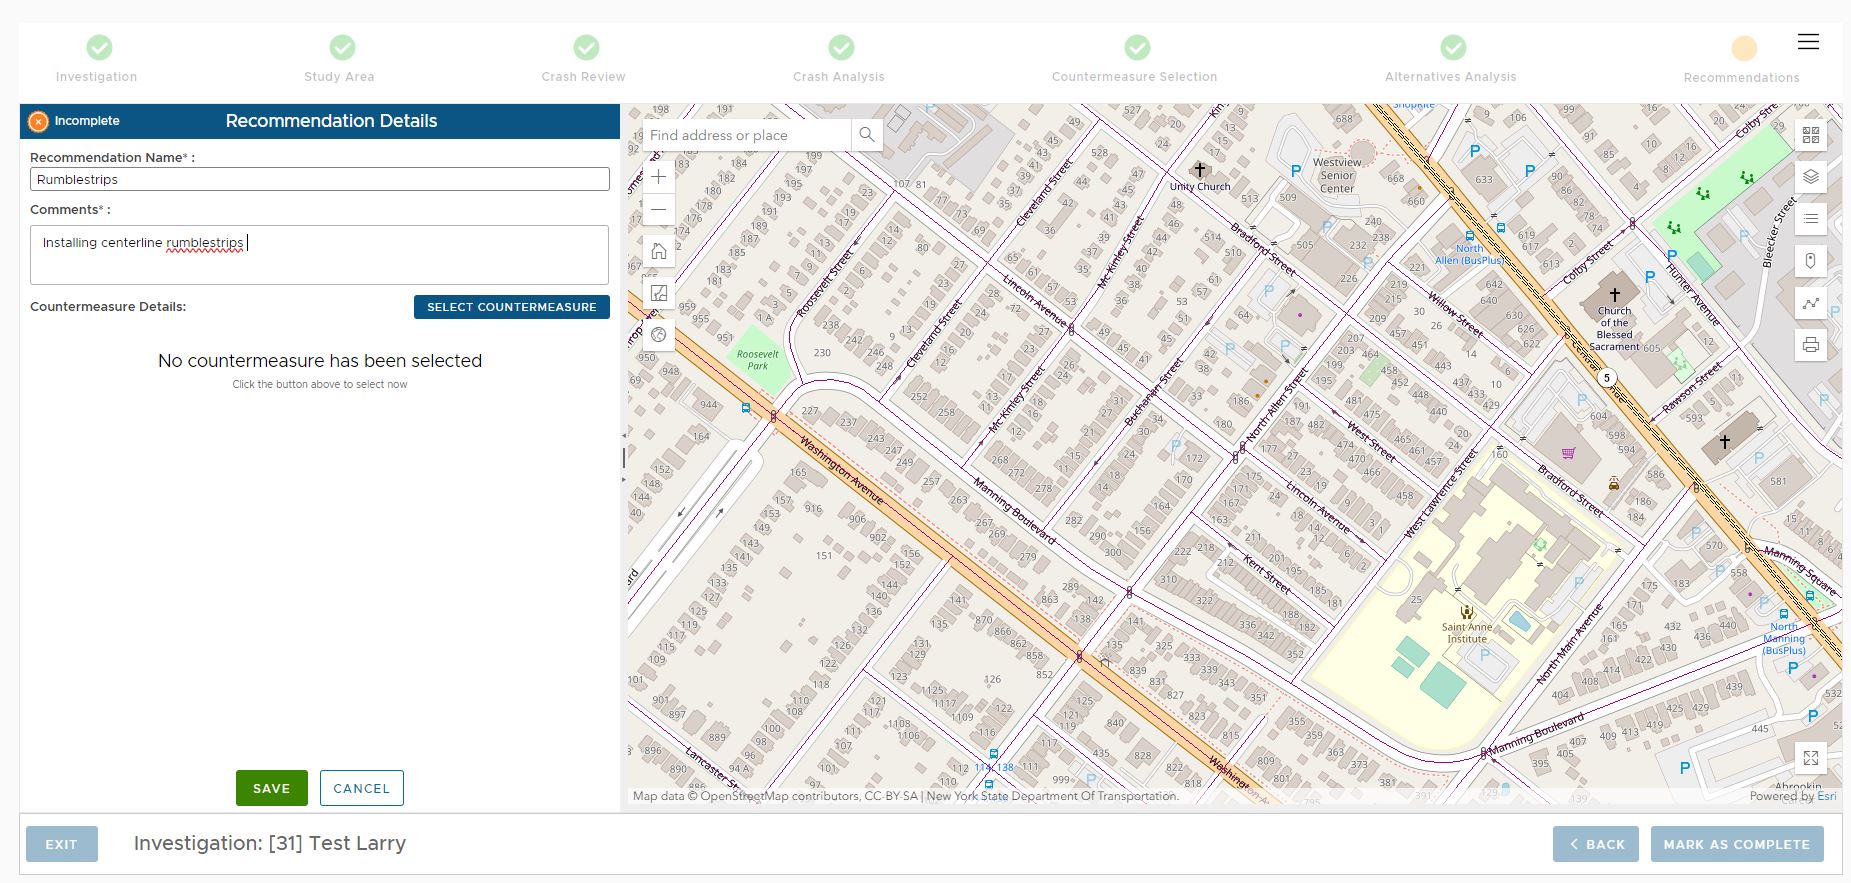
The user then enters a name for the recommendation as well as a more descriptive comment (both required fields) Once the user enters the name and comments, they should click the SELECT COUNTERMEASURE button which displays the Select Countermeasure dialog as shown below.
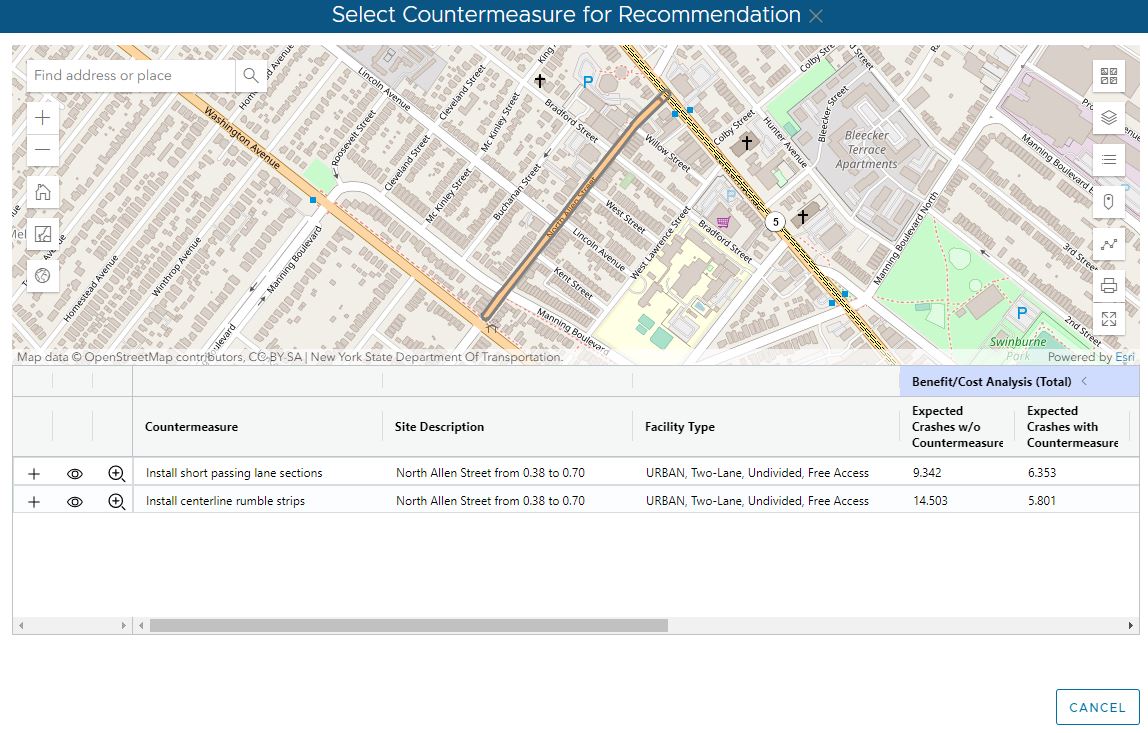
Each countermeasure that was added to the investigation is listed in the grid along with a map display showing the location of each. The View (eye) button will toggle the visibility of the countermeasure on the map display, while the Zoom (magnifier) will zoom the map to the countermeasure location.
To add a countermeasure to the recommendation, click the Add (+) button. This will add the countermeasure, close the dialog and return the user to the Recommendation Details page with the details of the newly added countermeasure displayed in the Recommendation Details panel as shown below.
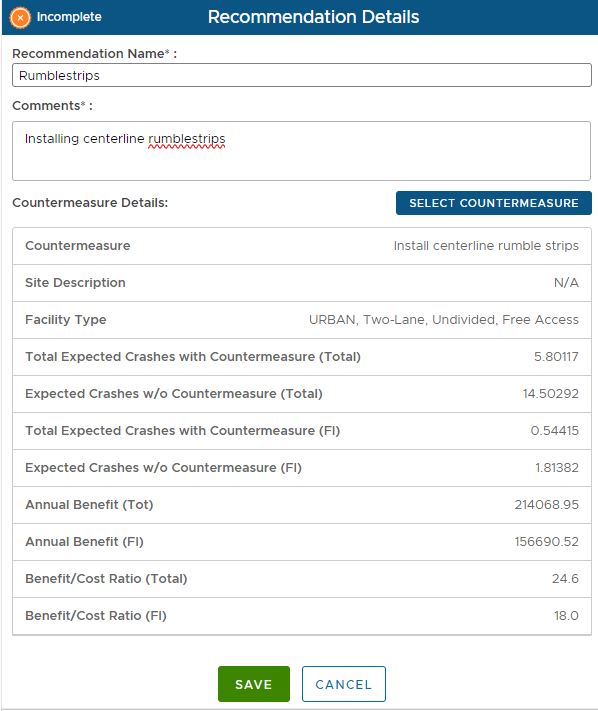
The final step in adding the new recommendation is to click the SAVE button at the bottom of the panel. This will save the Recommendation and return the user to the Recommendations main page where the new recommendation will be listed in the grid as shown in the image below.
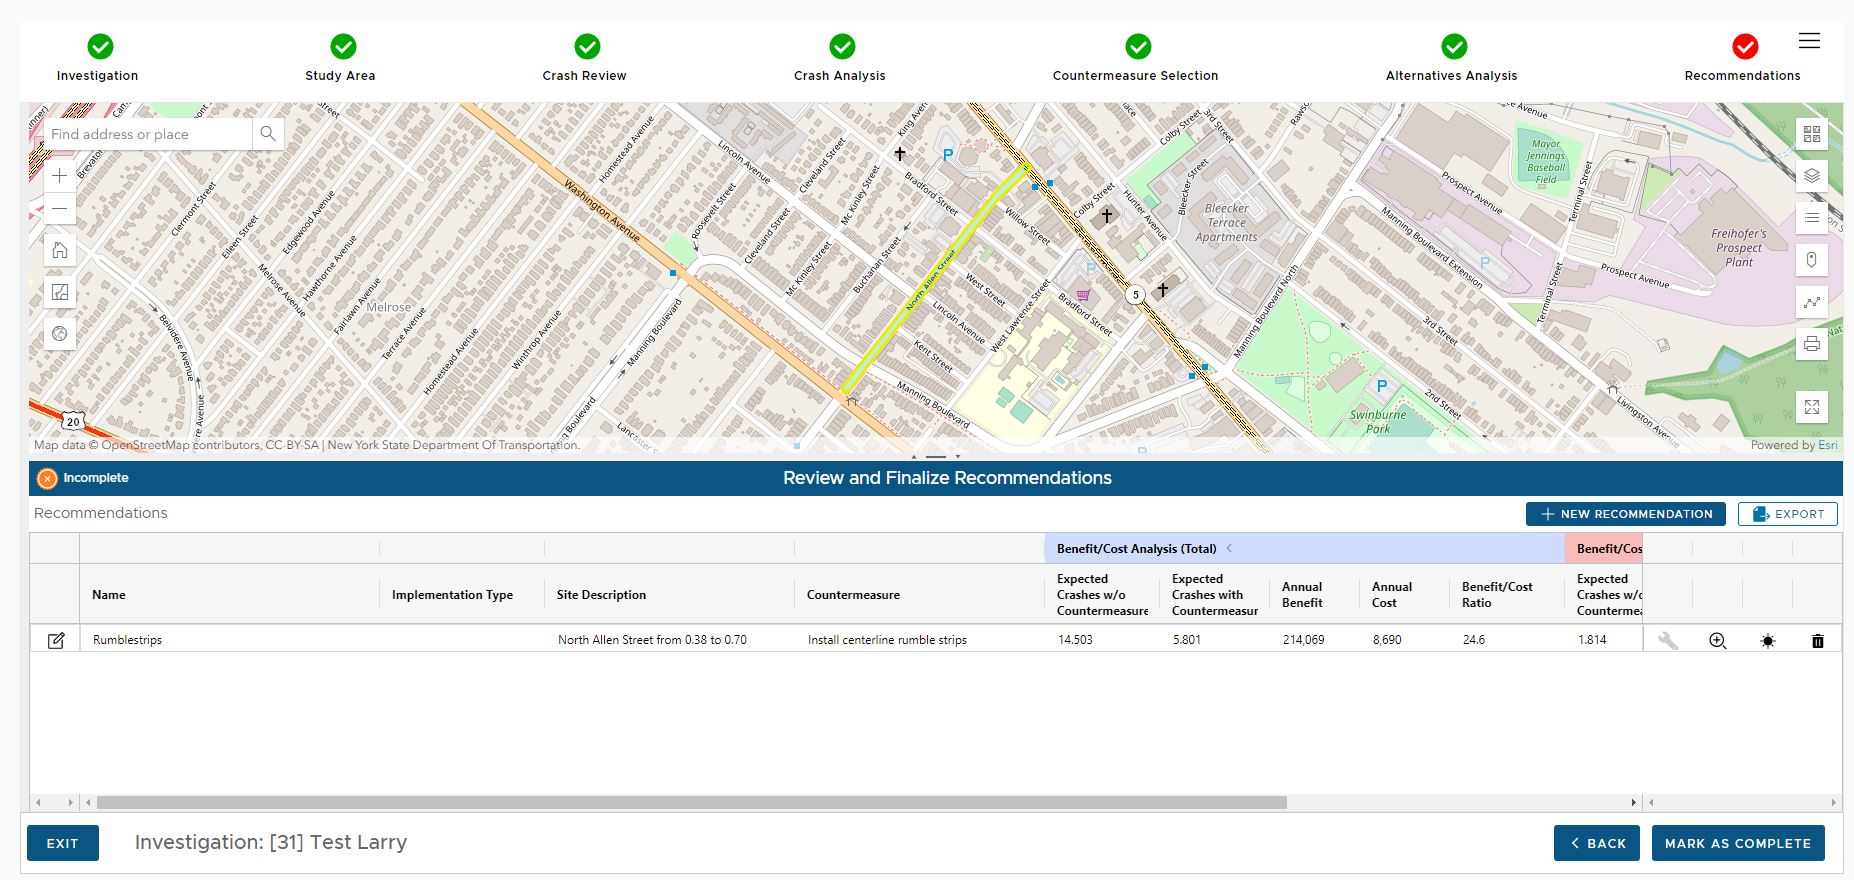
Each recommendation that is added is displayed as a row in the grid. Tools are available within each row of the grid as follows (from left to right):
•Edit - Opens the Recommendation details dialog allowing adjustments to the recommendation.
•Zoom - Zooms the map display to the location(s) of the recommendation
•Flash - Flashes the location of the recommendation on the map display
•Delete - Removes the recommendation from the investigation
Additional recommendations can be added to the investigation by clicking the ADD RECOMMENDATION button above the grid. Also, the recommendations grid can be exported to a CSV or Excel file by clicking the EXPORT button above the grid.
Completing an Investigation
When an investigation is in progress, its status is considered "Incomplete". The status can be viewed as a column in the grid on the Investigations main page. Once an investigation has been conducted resulting in one or more recommendations, the analyst should mark the investigation as "Completed". This flags the investigation to the rest of the organization that the investigation is done and complete and is ready for review and approval. Click this link to learn how to complete an investigation.
|